fbpx
Back

Please enter your username or email address.
You will receive a link to create a new password via email.

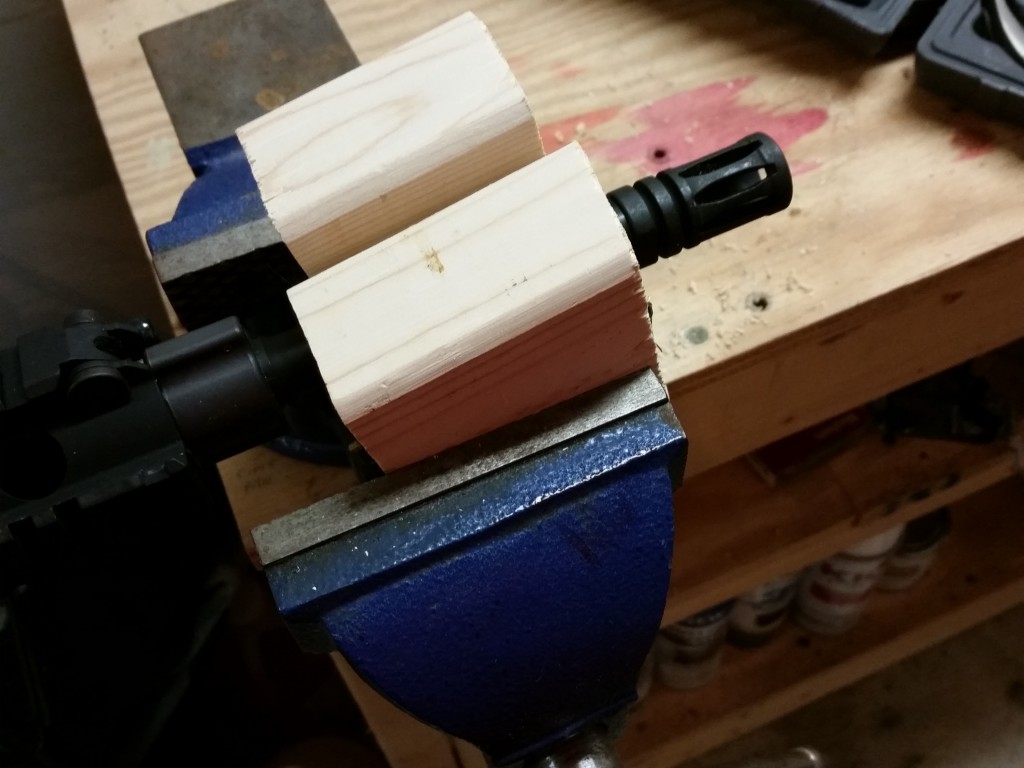
Rifle 101: DIY Barrel Blocks for Muzzle Device Work

Sitting here on this snowy March afternoon, I got to thinking about how my SilencerCo Specwar 556 suppressor is likely to be approved this week. For months now, I’ve had the included flash hider sitting in my gear cabinet waiting to be installed on my SR-15 barrel, but I have never gotten around to actually installing the device. Since today’s snow brought us around 4 inches on top of what we already had, I decided that something had to be done to get this rifle ready for the new can. I recently mounted my vise to my workbench, so all I really needed now was some way of holding the barrel still while removing the current A2-style flash hider and while tightening the supplied SilencerCo flash hider to the barrel.

Those who are well versed in AR-15 rifles will know that Knight’s Armament’s SR-15 is a little different than your typical AR pattern rifle. One of the most noteworthy improvements over standard rifles is the SR-15’s unique bolt with radius-cut lugs. This modified geometry helps to prevent shearing, but renders the barrel incompatible with popular barrel tools, like Geissele’s reaction rod. Since upper receiver clamps are not recommended for barrel work, SR-15 owners are limited to barrel blocks or KAC’s proprietary reaction rod style tool. Frankly, I cannot not justify the $80 price tag for this tool as I only own one KAC upper receiver assembly and rarely change muzzle devices, but I also did not want to pay for something as simple as barrel blocks and be forced to wait for their arrival. Fortunately, I had some extra scraps of 2×4 lying around that are the perfect size for this application.

Making the barrel blocks is simple and requires few supplies aside from the blocks. Using digital calipers, I found the SR-15 barrel to be approximately 0.625” in diameter. This meant that a 5/8” boring bit would be perfect for this project. These bits can be easily found in any hardware store for around $3. To give the wood some added “grip”, I also grabbed some friction tape to place on the inside walls of block. Friction tape is similar to hockey tape and both products can be used interchangeably here. The roll featured here cost less than $1.

With the supplies in hand, it is time to turn our 2×4 into proper barrel blocks. As a warning, the examples I make in these photos actually broke while removing the flash hider. While boring them out, I was not thinking and chose to cut the bore in the same direction as the wood grain. When the blocks were then placed in the vise and torque was applied, the wood split on one of sides along the grain. My second set was cut across the grain and proved much stronger.

After the bore has been cut, line it with two or three layers of friction tape.  This tape is not very sticky, but once it is pressed against the barrel and locked into the vise, it will stay in place. I also tightly wrapped the barrel in a layer of the tape for additional resistance. This process is similar to taping the grip on a tennis racquet or hockey stick. Just make sure it is pulled tightly onto the barrel.

Once the tape is in place, simply join the block halves around the barrel and place the whole unit in a bench-mounted vise. Do not be afraid to snug the vise jaws down very tightly; your barrel will not be damaged. Standard AR-15 flash hiders and muzzle brakes have 3/4” wrench flats. Any quality armorer’s tool will have cut-outs for these flats, but a standard wrench can also be used.

Loading more posts ...